
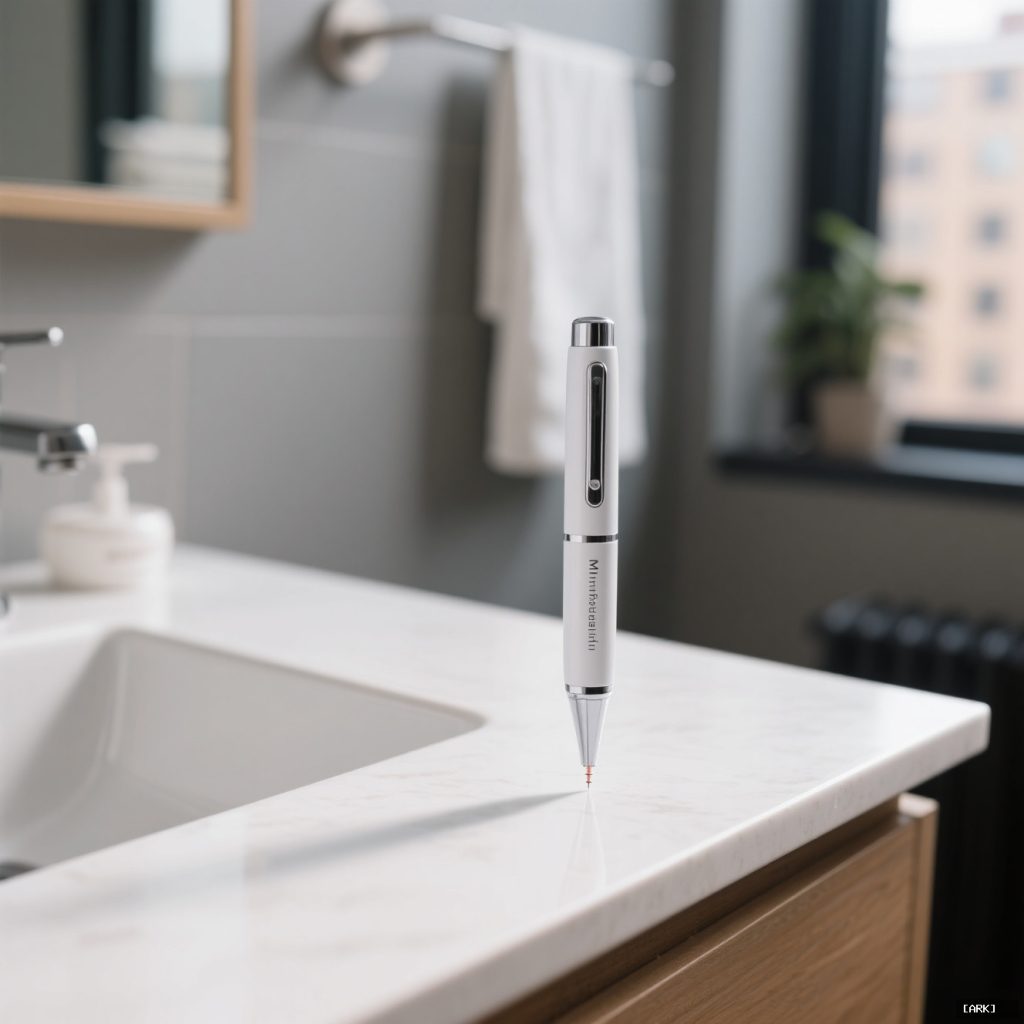
An at home microneedling pen promises professional results from your bathroom counter. This skin needling device bridges a gap between clinic and convenience, but the process is more complex than a social media reel. It’s a tool of profound personal ritual, colliding with the messy realities of our daily lives and the pressure for flawless, shareable skin.
We’re drawn to the control, the potential savings, and the privacy of addressing our skin concerns alone. Yet, holding that pen is an exercise in profound responsibility. You become the technician, the nurse, and the patient all at once. The outcome hinges not just on the device in your hand, but on the environment you create, the knowledge you hold, and the patience you muster. This isn’t a quick serum application; it’s a calculated intervention.
The Safety Paradox: Convenience vs. Clinical Protocol
What is the safety paradox between convenience and clinical protocol when using an at-home microneedling pen?
The safety paradox with at-home microneedling pens lies in the conflict between the device's convenience and the strict clinical protocols required for safe use. While the pen makes the procedure accessible, safety is not inherent to the gadget but a condition the user must create. Each microneedling session creates microscopic channels in the skin that are potential entry points for infection. This demands treating the home bathroom as a sanitized procedural field and ensuring the pen tip is surgically clean, not just superficially wiped. Rushing or skipping steps like a full alcohol soak compromises this protocol, elevating infection risk despite the tool's ease of use.
Safety with an at home microneedling pen isn’t a feature of the gadget itself. It’s a condition you manufacture. Whether it’s a pen or a derma roller, the action is the same: creating hundreds of microscopic channels in your skin. Each one is a potential entry point. Think of your bathroom not as a familiar space, but as a procedural field that needs sanitizing. The pen tip isn’t just a tool; it’s an object that must become surgically clean.
This is where the allure of convenience can betray you. Rushing because you have a video call in twenty minutes, skipping the full ten-minute alcohol soak for the cartridge, using a cleanser that leaves a residue—these small compromises aren’t trivial. They’re the difference between stimulating collagen and inviting infection. The American Academy of Dermatology stresses that improper sterilization is a leading cause of complications from at-home needling. Your protocol is your first and most important product.
Pen vs. Roller: A Matter of Mechanics and Precision
What are the key mechanical differences between a microneedling pen and a derma roller?
A microneedling pen uses a vertical, percussive stamping motion where needles pierce straight down and retract up, offering precise depth control and causing minimal surface trauma. In contrast, a traditional derma roller drags its needles across the skin at an angle, which can create a shearing effect, leading to micro-tears and inconsistent depth. The pen's mechanics are generally considered superior for targeted treatments, as they produce cleaner punctures with less tugging on delicate skin compared to the roller's dragging action.
Understanding the core difference between a pen and a roller is crucial. A traditional derma roller is exactly that—a roller. It drags its needles across the skin’s surface at an angle. This can create a shearing effect, causing micro-tears rather than clean, vertical punctures. The depth can be inconsistent, and the motion can tug at delicate skin.
A true microneedling pen uses a vertical, percussive stamping motion. The needles pierce straight down and retract straight up. This offers superior control over depth and causes less surface trauma. For targeting specific concerns—like a cluster of acne scars on a cheek or fine lines around the mouth—the pen’s precision is its greatest asset. It allows you to treat the damaged city block without unnecessarily disturbing the entire neighborhood of your face.
The Social Media Mirage: Process vs. Aesthetic
What is the difference between the immediate aesthetic and the actual process of at-home microneedling as highlighted by social media?
Social media often showcases dramatic 'immediate results' from at-home microneedling, creating an aesthetic mirage of instant glow. In reality, the actual process involves significant initial side effects like intense redness, sandpaper-like texture, and swelling for about 48 hours post-treatment. The perceived improvement and glow only appear days later, after this inflammation subsides and the skin begins its repair. This curated presentation distorts expectations, as microneedling is fundamentally a process of controlled injury and deliberate collagen induction, not an instant cosmetic fix.
Our perception of results is often filtered, literally and figuratively. Platforms are flooded with side-by-side photos showcasing dramatic transformations, often labeled “first use” or “immediate results.” What’s almost never posted is the reality of the 48 hours that follow: the intense redness (erythema), the sandpaper-like texture, the slight swelling that makes your skin feel tight. The “glow” comes days later, after the initial inflammation subsides.
This curated timeline distorts expectations. Collagen induction therapy is a process of controlled injury and deliberate repair. Your body needs weeks to lay down new collagen and elastin. The real results appear gradually, over a series of sessions spaced a month apart. Chasing the instant “after” shot leads to over-treatment, using needles that are too long, or needling too frequently—all of which damage the skin barrier and set back your progress. The ritual is private, slow, and unglamorous. The shareable aesthetic is merely the endpoint.
Beyond the Face: Treating Body Scars and Stretch Marks
How does using a microneedling pen on the body differ from using it on the face for treating scars and stretch marks?
Using a microneedling pen on the body for scars and stretch marks differs significantly from facial use due to skin structure. Body skin, like on the thighs or abdomen, is often thicker and more resilient, requiring longer needle lengths to effectively reach the dermal layer for collagen remodeling. This increases the risk of discomfort, pinpoint bleeding, and potential scarring if performed incorrectly. Additionally, treating larger body areas becomes a major logistical undertaking, requiring a larger sterile field and a greater time commitment compared to a facial routine.
Yes, you can use your device on the body. But scaling up the treatment area changes everything. The skin on your thighs, abdomen, or upper arms is structurally different—often thicker and more resilient. This might necessitate longer needle lengths to reach the dermal layer where collagen remodeling occurs, which inherently increases the risk of discomfort, bleeding (pinpoint bleeding is normal), and potential scarring if done incorrectly.
What seems like a simple extension of your facial routine becomes a major logistical undertaking. The sterile field needs to be larger. The time commitment expands from 15 minutes for your face to potentially an hour for a stretch mark area. Post-care requires enough serum to cover a significant surface area. It’s a stark reminder that our skin is a varied landscape, and effective treatment requires adjusting your strategy for each terrain.
The Quiet Phases: The Most Overlooked Steps
What are the most overlooked steps in at-home microneedling with a pen?
The most overlooked steps in at-home microneedling with a pen are the pre- and post-care phases, often called the 'quiet phases.' Proper skin preparation involves a thorough, oil-free cleanse followed by wiping with 70% isopropyl alcohol to eliminate surface pathogens and prevent clogging. Post-care is critical because the skin becomes highly absorbent after needling; it requires applying serums with clean, simple, and biocompatible ingredients, like hyaluronic acid, to maximize benefits and minimize risks of irritation.
Everyone focuses on the needling. The magic, however, happens in the quiet before and after. Prepping your skin isn’t about a quick splash of water. It requires a thorough, oil-free cleanse followed by a wipe with 70% isopropyl alcohol to eliminate surface pathogens. Any oil or residue can be driven into the micro-channels, leading to clogging or irritation.
Post-care is equally critical. Immediately after needling, your skin is a superhighway for absorption. This is a powerful benefit and a significant risk. You must use serums with clean, simple, and biocompatible ingredients. Hyaluronic acid and certain peptides are excellent choices. You must avoid anything with active acids (like AHA/BHA), retinoids, fragrances, or heavy alcohols, as they will cause severe irritation. This 24-hour window post-treatment is when your skin is most vulnerable to environmental aggressors like sun, pollution, and makeup. Protecting it isn’t a suggestion; it’s a requirement for success.
Choosing Your Tools: Needle Length and Frequency
How do you choose the right needle length and frequency for at-home microneedling?
Choosing the right needle length for at-home microneedling depends on your specific skin concern and treatment area. Shorter lengths like 0.25mm–0.3mm are used for enhancing product absorption by working on the epidermis. The 0.5mm–0.75mm range is common for at-home collagen induction, reaching the upper dermis to stimulate collagen for fine lines and texture. Needles 1.0mm and above are typically for professional use. Frequency varies, but treatments are often spaced 2–4 weeks apart to allow skin recovery and collagen remodeling.
Selecting a needle length is not about aggression; it’s about intention. It’s a targeted choice based on your specific skin concern and the area you’re treating.
- 0.25mm – 0.3mm: Often used for enhancing product absorption. These lengths primarily work on the epidermis and are sometimes considered “cosmetic” needling.
- 0.5mm – 0.75mm: The common range for at-home collagen induction. This depth reaches the upper dermis to stimulate collagen and elastin production, helping with fine lines, texture, and mild scarring.
- 1.0mm and above: Typically reserved for professional use. These lengths target deeper scarring and significant texture issues but carry higher risks of bleeding, pain, and side effects if used improperly.
Frequency follows a similar rule of “less is more.” Your skin needs a full cycle to repair and rebuild—typically 4 to 6 weeks. Needling more often than this doesn’t give your collagen time to synthesize; it simply re-injures the skin, leading to chronic inflammation and barrier compromise. Patience is not just a virtue here; it’s a biological necessity.
Your Pre-Needling Checklist: Non-Negotiables
- Sterilize: Fully immerse the needle cartridge in 70% isopropyl alcohol for a minimum of 10 minutes. Let it air dry on a clean paper towel.
- Cleanse: Wash your face with a gentle, non-oil-based cleanser. Follow with an alcohol wipe over the treatment area.
- Prepare Your Space: Have all post-care products open and within reach. Ensure your environment is clean and you will not be interrupted.
- Set Realistic Time: Allocate 20-30 minutes for the entire process, excluding prep. Rushing leads to mistakes.
- Plan Your Downtime: Commit to 24-48 hours of avoiding direct sun, strenuous sweat, makeup, and potentially irritating skincare products.
Navigating Common Questions
How often can I use my pen? For true collagen induction, once every 4-6 weeks is the standard guidance. Using it weekly is counterproductive and harmful.
What does it feel like? Most describe a prickling, vibrating sensation. Discomfort varies by area (forehead is less sensitive than upper lip). While numbing cream is an option, it adds a variable—you must ensure it’s fully removed before needling, and some creams can cause reactions.
Is it okay to share my device with a partner or friend? No. This is an absolute rule. A microneedling pen should be treated with the same biohazard consideration as a razor or a toothbrush. Sharing risks transmitting blood-borne pathogens.
Can I treat active acne? Do not needle over active, inflamed breakouts. You risk spreading bacteria across your face, a process known as “acne koebnerization,” which can turn a few pimples into a widespread eruption. Wait until the area is fully healed.
Sources & Further Reading
American Academy of Dermatology: What is microneedling? https://www.aad.org/public/cosmetic/younger-looking/microneedling
National Institutes of Health: A review of microneedling safety and efficacy. https://www.ncbi.nlm.nih.gov/pmc/articles/PMC4976400/
U.S. Food & Drug Administration: How to determine if your product is a medical device. https://www.fda.gov/medical-devices/classify-your-medical-device/how-determine-if-your-product-medical-device
About Our Expertise
Drawing from extensive research into traditional Chinese skincare practices, this guide integrates modern microneedling techniques with time-honored principles of holistic care. Our expertise ensures that every tip is grounded in both scientific evidence and cultural wisdom, offering a trustworthy resource for safe and effective at-home treatments.
As a platform dedicated to Chinese arts and culture, we emphasize the importance of patience and precisionu2014values deeply rooted in traditions like acupuncture and herbal medicine. This article reflects our commitment to authentic, well-researched content that bridges ancient knowledge with contemporary self-care, helping you achieve results with confidence and cultural insight.
✨ You Might Also Enjoy


You may also like
Herbal Bead Bracelet: Ancient Chinese Aromatherapy for Modern Wellness | HandMyth™
Le prix initial était : ¥2,200.00.¥1,353.00Le prix actuel est : ¥1,353.00. Ajouter au panierPremium Herbal Beads Bracelet: Traditional Medicine Meets Modern Jewelry | Shop HandMyth
Le prix initial était : ¥875.00.¥608.00Le prix actuel est : ¥608.00. Ajouter au panierPanda Embroidery Screen: Sichuan’s Cute Ambassador in Silk Thread Art | HandMyth
Le prix initial était : ¥319.00.¥231.00Le prix actuel est : ¥231.00. Ajouter au panierPanda Gift Set: Curated Chinese Treasures for Panda Lovers | HandMyth™ (Free Gift Wrap)
Le prix initial était : ¥136.00.¥118.00Le prix actuel est : ¥118.00. Ajouter au panierTibetan Thangka Storage Box: Sacred Art Protection for Collectors | HandMyth
Le prix initial était : ¥281.00.¥219.00Le prix actuel est : ¥219.00. Ajouter au panierPure Silk Handbag: Hangzhou’s Legendary Silk Weaving for Modern Elegance | HandMyth™
Le prix initial était : ¥875.00.¥786.00Le prix actuel est : ¥786.00. Ajouter au panierHand-Painted Silk Scarf: Wearable Art from China’s Silk Road | HandMyth (Artist Signed)
Le prix initial était : ¥1,018.00.¥936.00Le prix actuel est : ¥936.00. Ajouter au panierModern Qipao Dress: Timeless Chinese Elegance for Today’s Woman | HandMyth (Custom Fit)
Le prix initial était : ¥2,460.00.¥2,241.00Le prix actuel est : ¥2,241.00. Ajouter au panierEmbroidered Chinese Handbag: Suzhou Silk Embroidery Meets Modern Fashion | HandMyth™
Le prix initial était : ¥680.00.¥646.00Le prix actuel est : ¥646.00. Ajouter au panier


